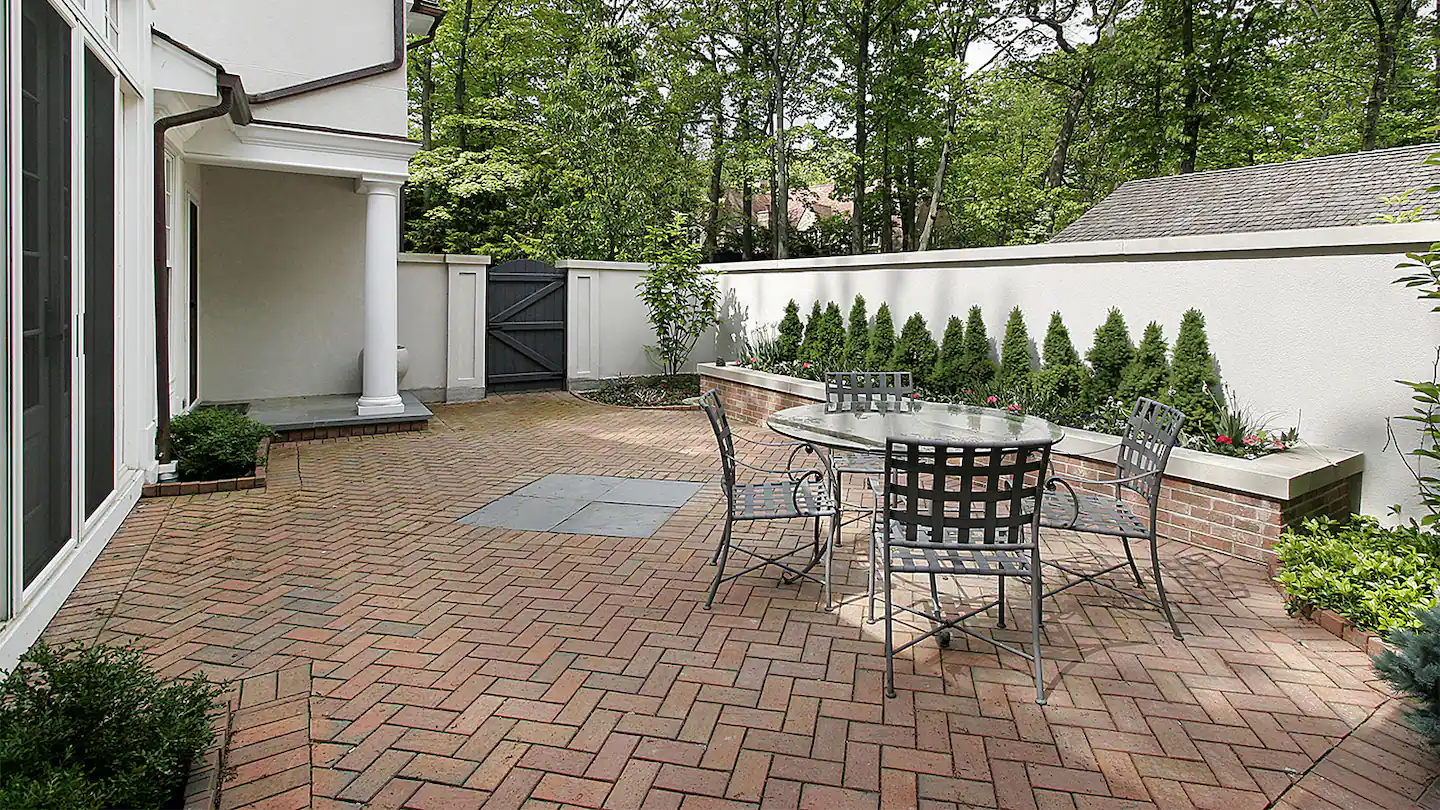
I remember looking at my brick patio one weekend, thinking it just needed a quick rinse. But once I started, I realized how deeply the dirt and moss had settled into those bricks. What I thought would take an hour turned into a whole day of scrubbing, spraying, and experimenting.
It’s amazing how quickly grime builds up, making a once beautiful space feel dull and tired.
After a few failed attempts, I finally cracked the code. Each mistake taught me something new, and by the end, I had a method that actually worked. Now, I can tackle the patio in half the time, with a lot less hassle.
If you’re staring at your own brick patio, wondering where to begin, don’t worry—I’ve got you covered. These tips will save you from all the extra scrubbing and give you the best results, step by step.
Let’s get into the details, and I promise you’ll see a difference in no time.
1. Sweep Away Loose Debris
When I first set out to clean my patio, I made the rookie mistake of ignoring the basic step of sweeping away all the loose debris. I figured the dirt would wash away when I got to rinsing and scrubbing. That was definitely not the case.
As soon as I started, I found that all those little bits of gravel, leaves, and dust only turned into more of a hassle, sticking everywhere and getting in the way. Sweeping may seem basic, but it lays the foundation for everything else.
After stopping to do it right, I saw the difference immediately. The whole process moved faster, and my tools worked better without all that loose junk piling up. The next time I tackled it, sweeping was my first move, setting up the entire space so I could focus on real cleaning.
Starting with a thorough sweep saves you frustration and sets the stage for a cleaner brick patio, giving you a fresh surface to work with from the very beginning.
Read more about why Brick Siding is so popular in 2024.
2. Rinse with Water
After clearing away all the loose debris, I thought I could go straight to scrubbing. That turned into another mess. Every scrub stroke just spread mud around, making everything look worse than when I started.
So, I went back to the basics and gave the entire patio a thorough rinse with plain water. Turns out, this step made a huge difference. By soaking the bricks, I loosened the dirt and grime that had settled deep into the surface, making it much easier to clean.
Without that initial rinse, I would’ve ended up scrubbing twice as hard. It’s one of those things that seems simple, but it prepares the patio perfectly, letting you work on the real stains without dealing with extra layers of grime.
We also prepared a guide for selecting and installing Brick Paneling.
3. Apply a Gentle Cleaner
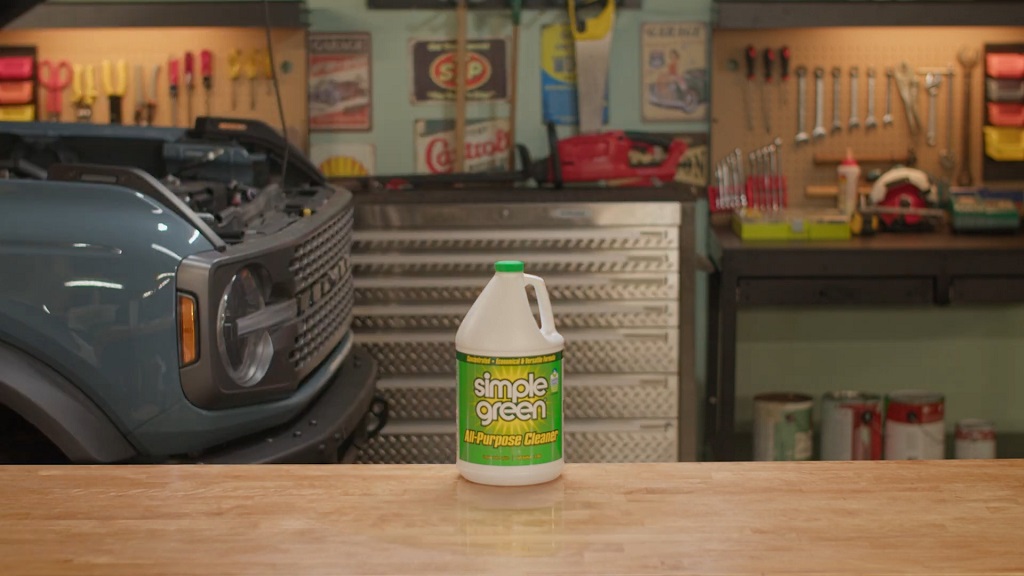
Once I rinsed the patio, I realized water alone wouldn’t cut it for the tougher stains. That’s when I decided to try a gentle cleaner. I wanted something that wouldn’t damage the brick or leave a residue but would still break down the grime.
After a bit of trial and error, I found that certain cleaners work better than others for this job. A good cleaner breaks down dirt without too much scrubbing, making the next steps much easier.
Here are a few that I found effective:
- Simple Green All-Purpose Cleaner: Eco-friendly and safe for brick, with a formula that works on heavy grime.
- Wet & Forget Outdoor Cleaner: No bleach or harsh chemicals, and it works well on mildew.
- Zep Neutral pH Floor Cleaner: A balanced formula that’s safe for surfaces while cutting through dirt.
Also read our guide on how to design a Perfect brick facade.
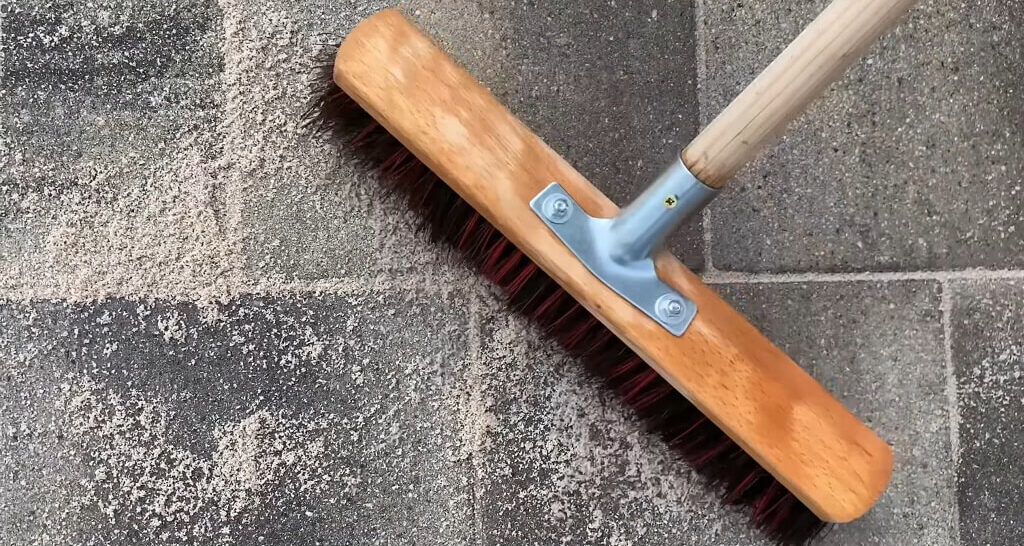
4. Use a Stiff-Bristle Brush
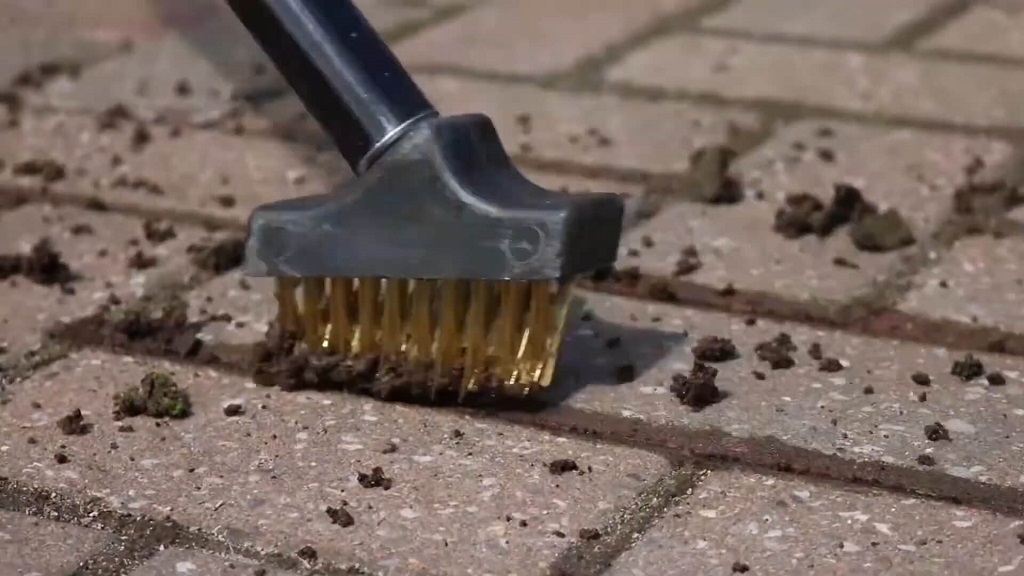
Armed with my cleaner, I thought I’d just wipe everything off, but that was far from reality. I quickly learned that a stiff-bristle brush is your best friend for this job. Unlike softer brushes or cloths, which barely touch the surface, a stiff brush gets into all the crevices and rough spots in the brick, where dirt and algae cling tight.
At first, it felt like extra effort, but once I saw how much grime the brush lifted, I realized it was worth it. It’s a bit of work, but the results make the patio look like new again, without leaving spots that lighter scrubbing can’t reach.
I’d recommend using a quality brush that’s tough on dirt but doesn’t scratch or damage the brick surface.
Here are a few solid options:
- OXO Good Grips Heavy-Duty Scrub Brush: Ergonomic design and durable bristles that make scrubbing easier.
- Liflex Stiff Bristle Brush: Great for tougher stains with a large surface area for efficient cleaning.
- Rubbermaid Commercial Stiff Utility Brush: Ideal for brickwork, with strong, long-lasting bristles that reach deep.
5. Target Tough Stains with Vinegar
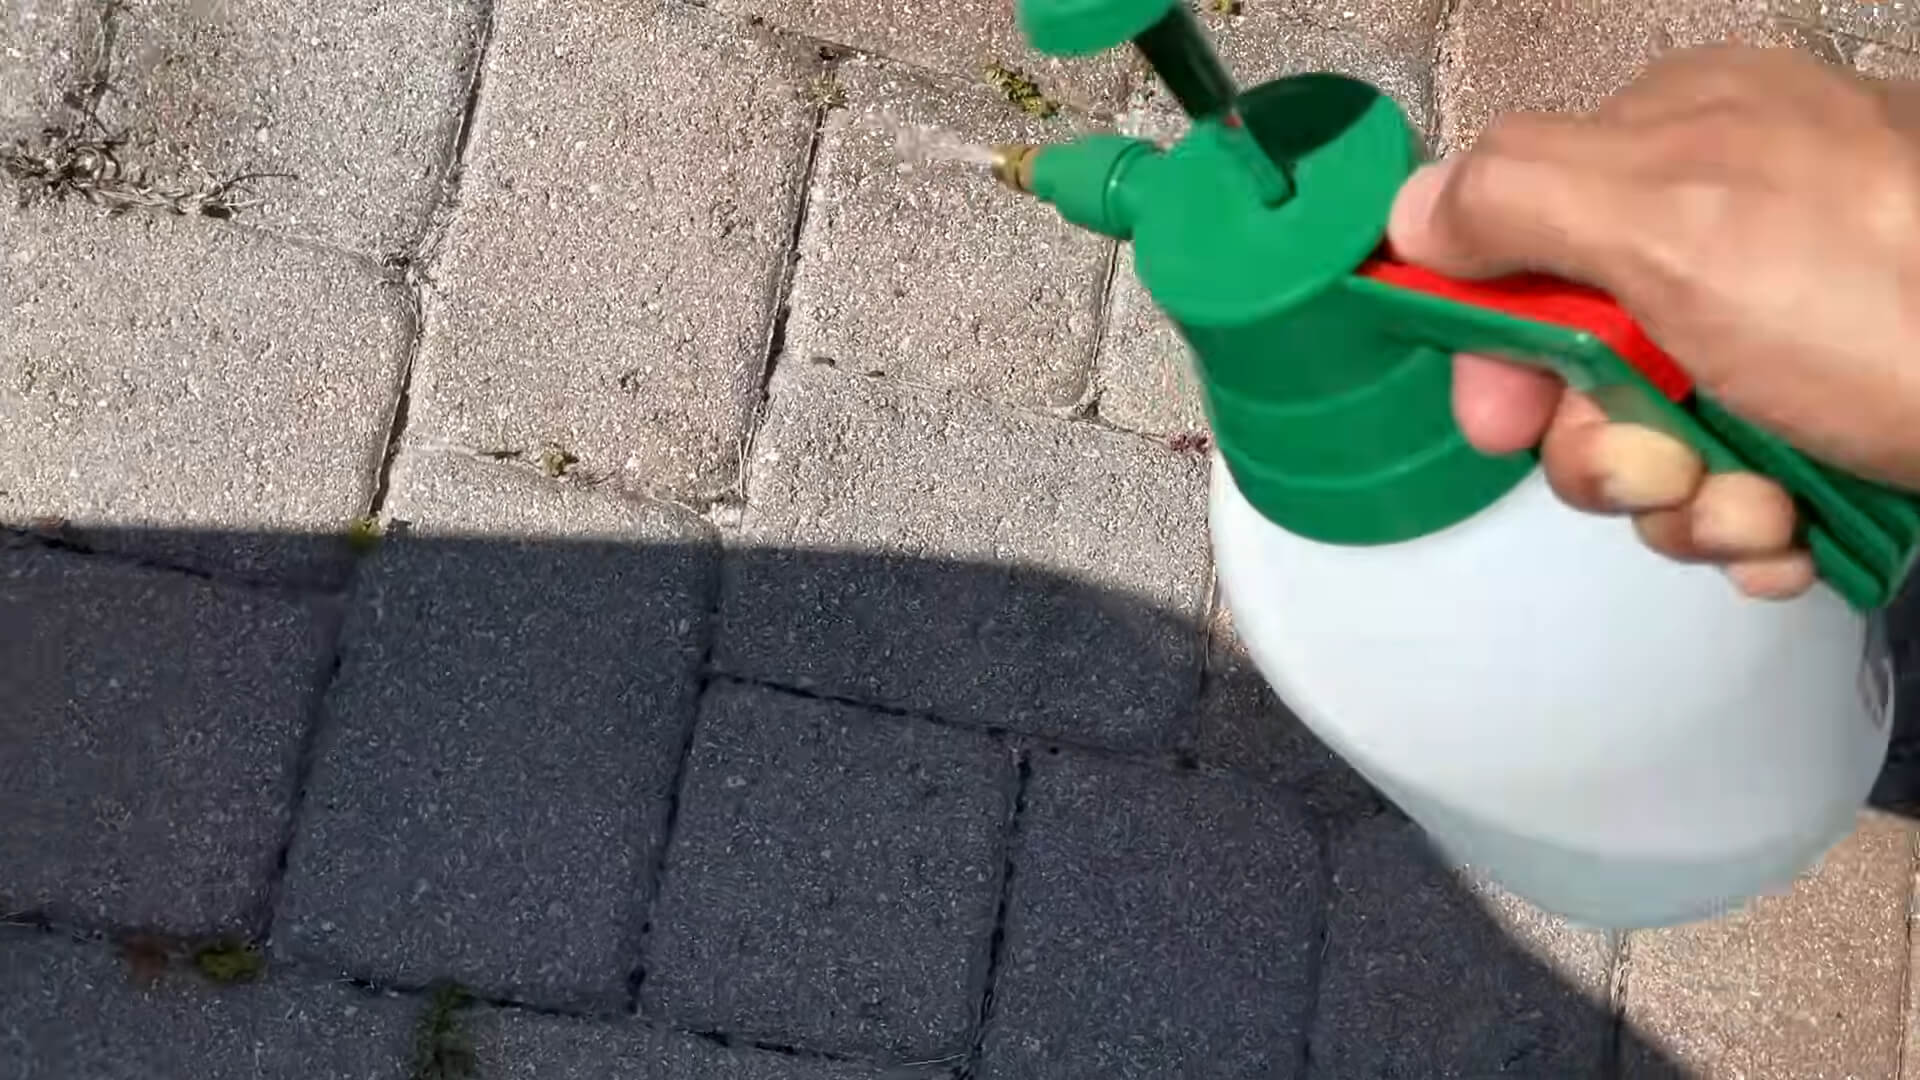
After I scrubbed the surface, I noticed there were still a few stubborn stains holding on, especially in areas that get little sun or where moisture tends to linger. That’s when I turned to one of the best DIY solutions: vinegar.
I poured some straight white vinegar on those tough spots and let it sit for about 15 minutes. It was a bit of a gamble, but it worked like a charm. The vinegar broke down the stains and made them easier to scrub away without harsh chemicals or extra scrubbing.
The process is simple but effective. The acidity of the vinegar lifts stains that regular cleaners don’t touch, making it a solid solution for those tougher areas. Just be sure to rinse it off thoroughly afterward to avoid any residue.
Here are a few reliable types of vinegar for this task:
- Heinz Cleaning Vinegar: Slightly stronger than cooking vinegar, perfect for tough outdoor stains.
- Bragg Organic Distilled White Vinegar: Pure and effective, with a bit of added potency for heavy-duty cleaning.
- Lucy’s Family Owned Distilled White Vinegar: Affordable and easy to find, great for large outdoor projects.
6. Scrub Grout Lines
Once the stains lifted, I realized the grout lines still looked grimy, holding onto dirt that the initial scrubbing missed. Ignoring the grout would have left the job half-done, so I got in close and used a smaller brush to target these lines. Working on the grout made a huge difference; it brightened the entire patio and gave the whole area a cleaner, well-maintained look.
The trick is to use a narrow, firm brush that can reach into those tighter spaces and loosen up the dirt without much extra effort. The grout lines take a bit more patience, but the results are worth it. Fresh, clean grout makes each brick stand out and gives the patio a completely refreshed look.
Here are a few grout brush options that work well:
- O-Cedar Power Scrub Brush: Compact and firm, perfect for grout cleaning.
- Tile & Grout Brush by Rubbermaid: Designed to fit into narrow spaces, with strong bristles for deeper cleaning.
- Fuller Brush Grout and Tile Brush: Angled bristles to reach every corner of the grout lines.
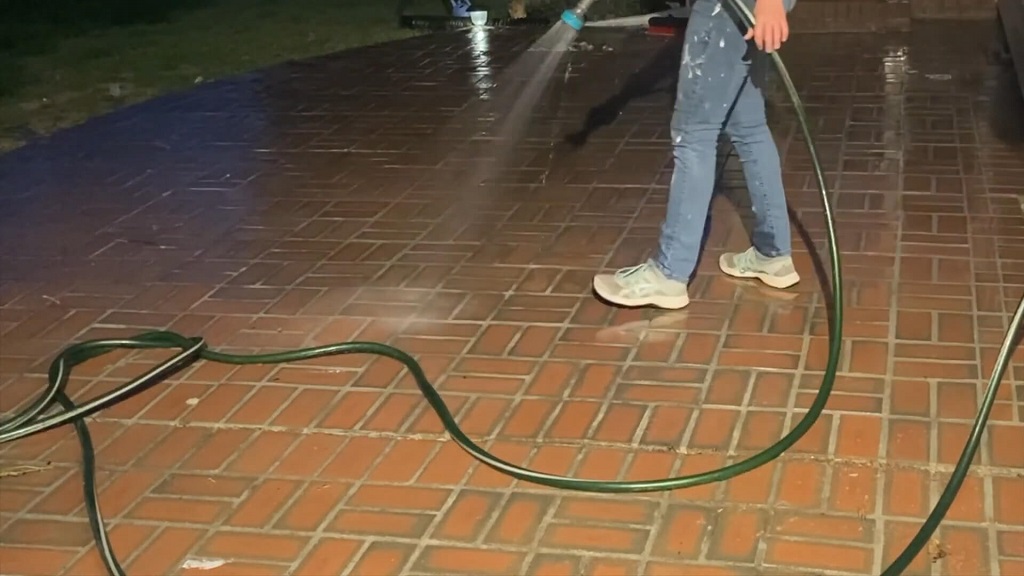
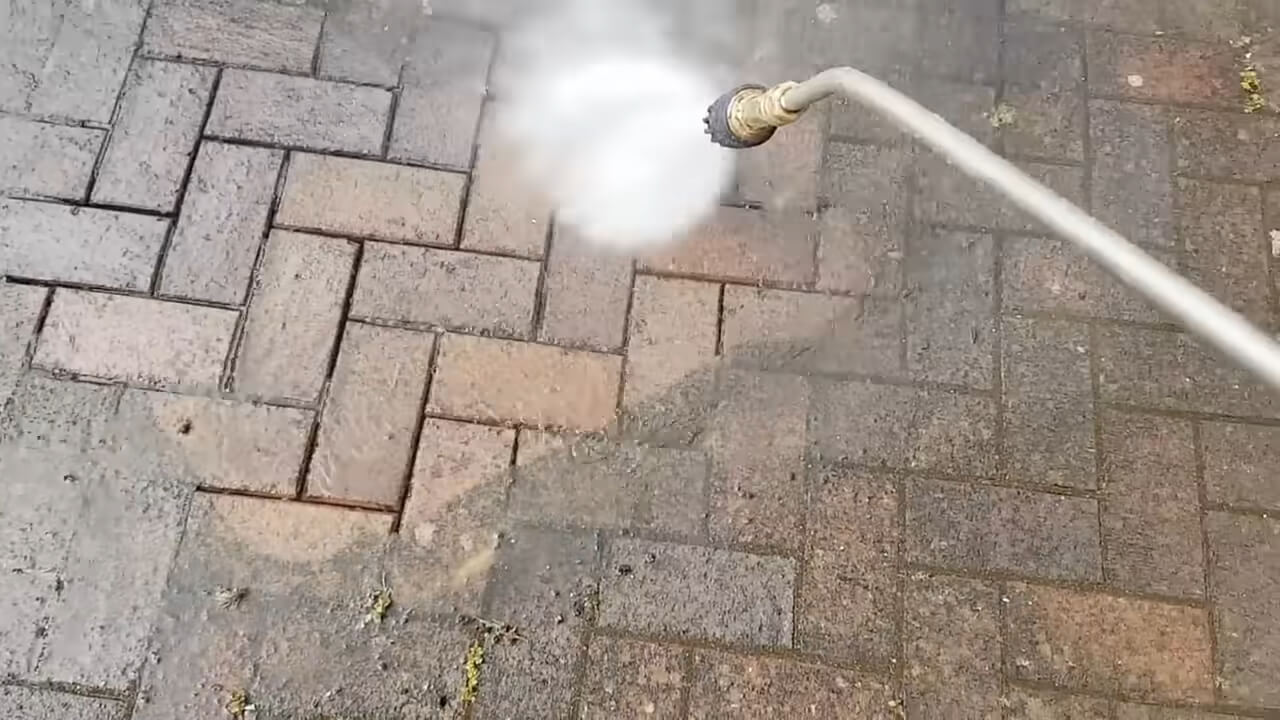
7. Rinse Thoroughly
After scrubbing everything down, especially the grout lines, I was eager to see the final results. But as I stepped back, I noticed some residue from the cleaner and vinegar still lingering on the bricks.
It turns out, a final rinse is key to getting that clean, fresh look without any leftover grime. So, I grabbed the hose and gave the entire patio a thorough rinse from one end to the other.
The trick here is to be generous with the water, ensuring every inch gets rinsed, especially those little crevices where dirt or cleaner might still be hiding. A good rinse washes away the loose dirt, cleaner residue, and any vinegar, leaving the bricks looking renewed.
Without this step, you risk dried-on residue that can dull the patio’s finish, making it look less than perfect.
Rinsing thoroughly made the difference, revealing the clean, bright look I’d been aiming for and leaving the entire patio refreshed and ready to enjoy.
8. Apply a Baking Soda Paste
After rinsing, a few stubborn spots still refused to budge. That’s when I turned to baking soda, a household go-to for those last bits of grime.
I mixed baking soda with a bit of water to make a thick paste and applied it directly onto the spots that needed extra attention. I left it to sit for about 15 minutes, letting it work its way into the stains.
The paste acts like a natural scrub, and when I went back with a brush, the stains lifted easily. It was almost like they were never there.
The baking soda paste has a gentle abrasive quality that works wonders without damaging the brick surface. After trying this, I was amazed at how it removed even the most persistent marks.
Here are a few types of baking soda that work well for this:
- Arm & Hammer Baking Soda: Classic and reliable, perfect for any cleaning task.
- Bob’s Red Mill Baking Soda: A fine powder texture that mixes easily into a paste.
- 365 by Whole Foods Baking Soda: Affordable and effective, good for larger projects.
9. Use a Pressure Washer for Deep Cleaning
After going through all the scrubbing and spot treatments, I noticed a few areas that still looked a bit dull compared to the rest. That’s when I decided to bring out the pressure washer. A pressure washer can be a game-changer for deep cleaning, especially for larger patios or bricks that have accumulated years of dirt and grime.
I kept the pressure on a moderate setting to avoid damaging the bricks, holding the nozzle at an angle to wash away any lingering grime without eroding the surface.
The result was incredible—years of buildup disappeared, and the brick color looked renewed. It was like giving the whole patio a refresh without any hard scrubbing.
If you’re considering a pressure washer, here are some options:
- Sun Joe Electric Pressure Washer: Compact, affordable, and ideal for medium-duty cleaning.
- Greenworks 2000 PSI Pressure Washer: Powerful enough for tougher stains, with adjustable settings.
- Ryobi 2300 PSI Brushless Electric Pressure Washer: A reliable choice for deep cleaning outdoor surfaces.
10. Remove Mold with Bleach
After all the scrubbing and pressure washing, I found some patches of mold still clinging to the shaded areas of the patio. Standard cleaners couldn’t touch it, so I tried using a bleach solution, and it worked like a charm.
I mixed one part bleach with three parts water, applied it directly to the moldy spots, and let it sit for around 10 minutes. This solution broke down the mold and lifted the stains without any heavy scrubbing.
To stay safe, I used gloves and kept the area well-ventilated. After letting the bleach do its work, I gave the patio a thorough rinse to wash away any leftover solution. The mold was gone, leaving a clear, bright surface that looked better than I’d expected.
Here are some bleach options that work well for this:
- Clorox ProResults Outdoor Bleach: Effective against mold and mildew, great for outdoor surfaces.
- Mold Armor E-Z House Wash: A convenient, pre-mixed solution that works on tough mold patches.
- Tilex Mold & Mildew Remover: Easy spray application, perfect for targeting smaller mold spots.
11. Apply a Sealer for Protection
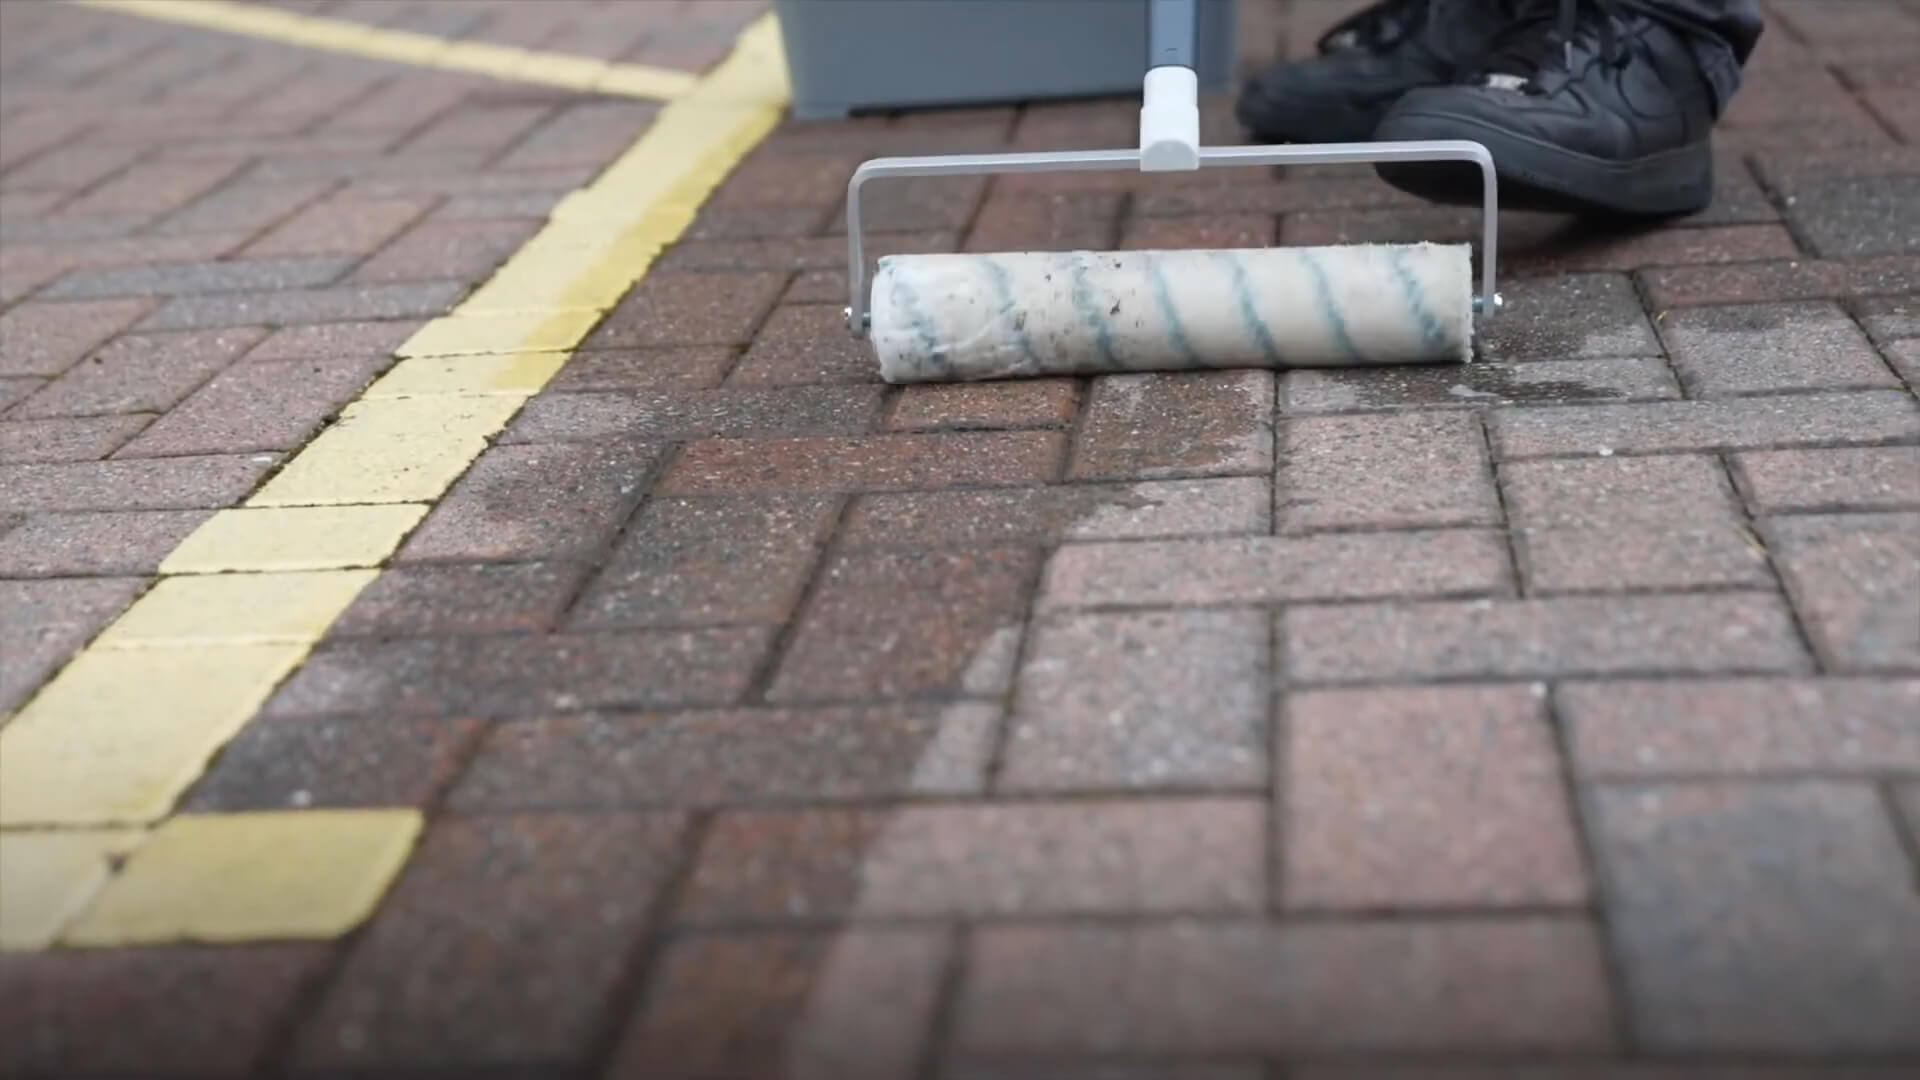
Once the patio was finally clean, I realized I didn’t want to go through all that effort again anytime soon. That’s when I decided to add a sealer to protect the bricks from future dirt and stains.
A good sealer acts like a barrier, keeping moisture and grime from settling into the surface, making it easier to keep clean over time.
Applying the sealer was straightforward. I poured it onto a small section of the patio and spread it evenly with a paint roller, working my way across the bricks. After it dried, the sealer gave the patio a subtle, clean finish without altering the look of the brick. The best part is that the next time dirt tries to settle, a simple rinse should do the trick.
Here are some quality sealers to consider:
- Foundation Armor Wet Look Sealer: Adds a protective layer and enhances color without a glossy finish.
- Glaze ‘N Seal Clear Sealer: Provides durable protection and is resistant to water and stains.
- Eagle Natural Seal: A clear, waterproofing option that’s perfect for patios with heavy foot traffic.
12. Schedule Regular Maintenance
After putting in the time and effort to get the patio looking spotless, I realized that keeping it that way would be much easier with a bit of regular upkeep. Instead of waiting for dirt, moss, and stains to build up, I set up a simple maintenance routine.
A quick sweep every week keeps debris off the surface, and a light rinse once a month helps prevent grime from settling in. Every few months, I give it a deeper clean, focusing on any spots that start to look a little dull.
Regular maintenance doesn’t need to be a big task, but it keeps the patio looking fresh and saves a lot of effort down the road. With this routine, I can enjoy a clean patio all year without the hassle of a full-scale scrub every time.
Here’s a simple maintenance checklist that’s worked for me:
- Weekly: Sweep away debris to keep the surface clean.
- Monthly: Rinse the patio with water to remove any settled dust or dirt.
- Every Few Months: Scrub any problem areas and check for any mold or algae spots.
FAQs
How often should I clean my brick patio?
A seasonal cleaning every three to four months is enough to keep the patio looking good. For high-traffic areas, you may want to clean every couple of months.
Can I use soap to clean my brick patio?
Yes, mild dish soap mixed with water can be used for general cleaning. Avoid harsh soaps, as they can leave a residue on the bricks.
What’s the best way to remove rust stains from brick?
Try a mixture of lemon juice and baking soda or a specialized rust remover for bricks. Apply, let it sit, then scrub and rinse thoroughly.
Is it safe to use a wire brush on a brick patio?
It’s best to avoid wire brushes, as they can damage the brick’s surface. Use a stiff-bristle brush instead for effective scrubbing without harm.
Can I use a pressure washer on old brick?
Yes, but keep the pressure low to avoid damaging aged or delicate bricks. Hold the nozzle at a slight angle and keep it a few inches away from the surface.
Do I need to seal my brick patio every year?
Most sealers last 2–3 years, so sealing every two years should be enough. High-traffic patios may benefit from annual sealing for extra protection.
How can I prevent moss from growing on my patio?
Regular sweeping and rinsing will help prevent moss. For areas that stay damp, consider applying a moss-resistant solution once a year.
Last Words
After going through all these steps myself, I can tell you that cleaning a brick patio doesn’t have to be the giant hassle it seems. Once you get the basics down and find what really works, it becomes manageable.
Each step, from the initial sweep to that final seal, transforms the space and keeps it looking fresh. If you stick to a simple routine, your patio can stay clean without all the frustration I went through at the start.
With a bit of regular upkeep, you’ll be able to enjoy a clear, inviting patio whenever you want. A few hours of effort now saves you a lot of work later, and there’s nothing better than stepping back to see a space you’re actually proud of.